Installing and Configuring Snort on Ubuntu
Introduction
Snort is a powerful open-source intrusion detection and prevention system that analyzes network traffic in real-time. In this blog, I will guide you through the installation and configuration of Snort on Ubuntu. By the end of this post, you’ll be able to detect and analyze network threats using Snort’s customizable rule sets.

Installing Snort on Ubuntu
Step 1: Install Snort
To begin, you can install Snort on your Ubuntu virtual machine (VM) using the following command:
sudo apt-get install snort -y
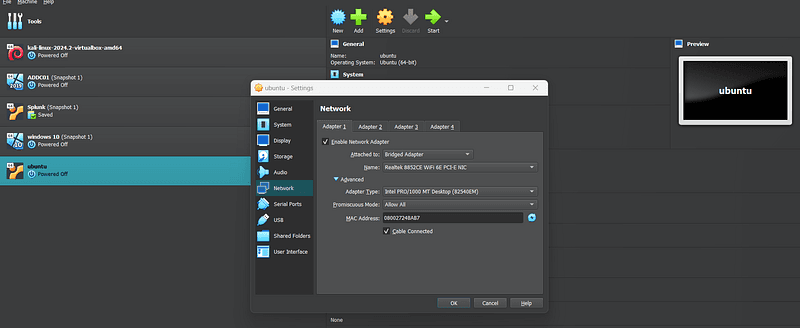
During the installation process, Snort will prompt you to specify the network address range for your local network (as shown below). This setting allows Snort to know what range of IP addresses it should monitor, typically known as HOME_NET.
You will be asked to provide a CIDR block to define your network. A common CIDR for a local network is 192.168.1.0/24. In my case, I used 10.0.2.0/24 as I’m using a virtualized environment (as seen in the image).

After the installation is complete, verify the version of Snort using
snort --version

Step 2: Enable Promiscuous Mode
Snort needs your network interface to be in promiscuous mode to capture all network traffic. To enable this, run the following command
If you’re running Ubuntu as your main OS, this command will help enable promiscuous mode for your network interface.
sudo ip link set enp0s3 promisc mode on
Step 3: Snort Directory and Configuration Files
Once installed, Snort’s default directory is /etc/snort. Make a copy of the snort.conf file before editing it, as this configuration will define how Snort functions. In the configuration file, specify the network you want to monitor by setting the variable ipvar HOME_NET to your network's IP range.

Customizing Snort Rules
Step 4: Rules Directory
Snort uses rules to detect suspicious traffic. You can find Snort’s default rules in /etc/snort/rules. Local, user-defined rules can be found in local.rules. These rules will help you customize Snort to monitor specific network events.
Step 5: Creating Custom Rules
Let’s create a custom rule to detect ICMP pings. Open the local.rules file

and add the following rule:
alert icmp any any -> $HOME_NET any (msg: "ICMP PING DETECTED"; sid:1000001; rev:1;)

This rule will trigger an alert when any ICMP ping request is detected on your network.
Once the rule is in place, you can test your configuration by running Snort. If Snort detects ICMP traffic (like a ping), it will generate an alert based on this rule.
Save the rule and proceed to the next step.
Adding Community Rules
In addition to writing your own rules, you can also download Snort Community Rules and add them to your local.rules file. The community rules are open-source and maintained by Snort, providing a solid baseline for network monitoring and threat detection.
Here’s how you can download and add them:
- Download the Snort community rules by visiting the Snort website.
- Unpack the rules and place them in the
rules/directory on your system. - Open the
local.rulesfile and include any relevant community rules by copying them from the downloaded rule set and pasting them into yourlocal.rules.
This will allow you to leverage both your custom rules and a robust set of predefined community rules for enhanced detection capabilities.
Step 6: Run Snort
To start Snort, run the following command:
sudo snort -q -l /var/log/snort -i enp0s3 -A console -c /etc/snort/snort.conf
-lspecifies the directory where log files are stored.-iidentifies the interface to monitor.-A consolesends alerts to the console.-c /etc/snort/snort.conf: Instructs Snort to use the configuration file located at**/etc/snort/snort.conf**

You should see alerts in real time when you generate network activity, like a ping.
Pinging from Kali VM
For demonstration, let’s ping your Ubuntu VM from another virtual machine (Kali) that shares the same network interface. When the ping is executed, Snort should generate an alert on the Ubuntu VM.


Viewing Alerts with Wireshark
Snort logs packet captures in the /var/log/snort directory. These logs can be viewed with tools like Wireshark, which provides a detailed breakdown of captured packets.

Automating with Snorpy
Creating rules by hand can be tedious, but Snorpy, an online rule generator, simplifies this process. You can generate complex Snort rules easily using Snorpy’s graphical interface.

Advanced Logging with Syslog and Splunk
To avoid cluttering the console with alerts, switch to the fast option:
-A fast
This will log alerts in syslog format, which can be integrated with tools like Splunk for more advanced network analysis and monitoring.
Conclusion
Setting up Snort allows you to gain visibility into your network and detect potential security threats. With custom rules and proper logging, Snort becomes a powerful tool in your security toolkit. Whether you are learning intrusion detection or deploying a robust defense system, Snort’s flexibility makes it a must-know tool for network security.
Stay tuned for my next post, where I’ll dive deeper into creating complex Snort rules and integrating it with advanced monitoring systems.
If you’re interested in more tips and resources, feel free to follow me on my blog or Linked-In.